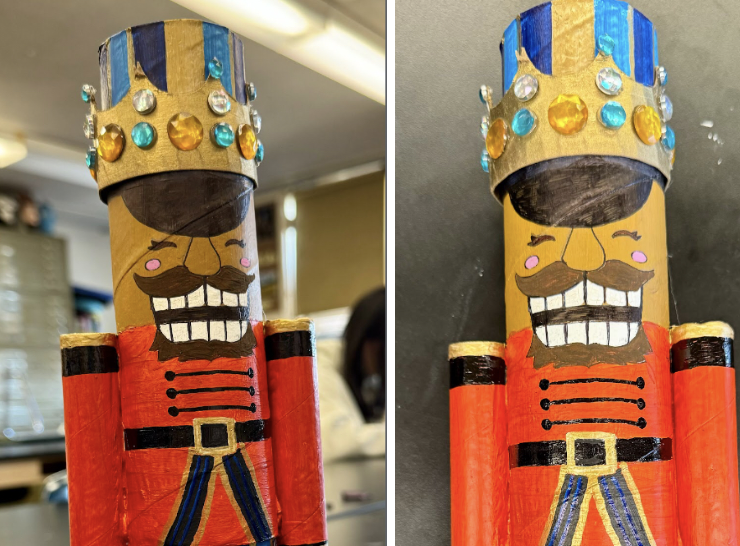
As the holiday season is around the corner, it’s never too early to start decorating your home with holiday decorations. You could still do so even if you want to save a little money this year by creating an easy and enjoyable craft inspired by my upcycle art class—thank you Ms. Salisbury for the idea. Here’s how to create cardboard nutcrackers!
Before we get into the craft, it’s important to know a little about the history of nutcrackers. Once you know their history, you can decide if you want to create a traditional or a more modern nutcracker.
The first nutcrackers date all the way back to the 3rd or 4th century B.C. Like modern-day nutcrackers, they were also decorated with engravings. The reason why they are shaped like pillars is because, like pillars, they symbolize strength and power. When nutcrackers are placed at home, they are believed to bring luck and protect the home. Moreover, they watch the family over to keep danger and spirits away.
Materials
- A few pieces of blank paper or a sketchbook
- A pair of scissors/craft knife
- Hot glue gun/Super glue/Gorilla glue/Tacky glue (Any strong glue)
- 1 used-up paper towel roll
- 1 used-up toilet paper roll
- Colored pencils/crayons/markers (Any coloring materials)
- White acrylic paint (primer)
- Assorted acrylic paint colors
- 1 pencil
- 1 eraser
Optional—Embellishments (beads, glitter, crystals, gemstones, wire, clay, fake flowers, ribbon, decorative tape, etc.)
Procedure
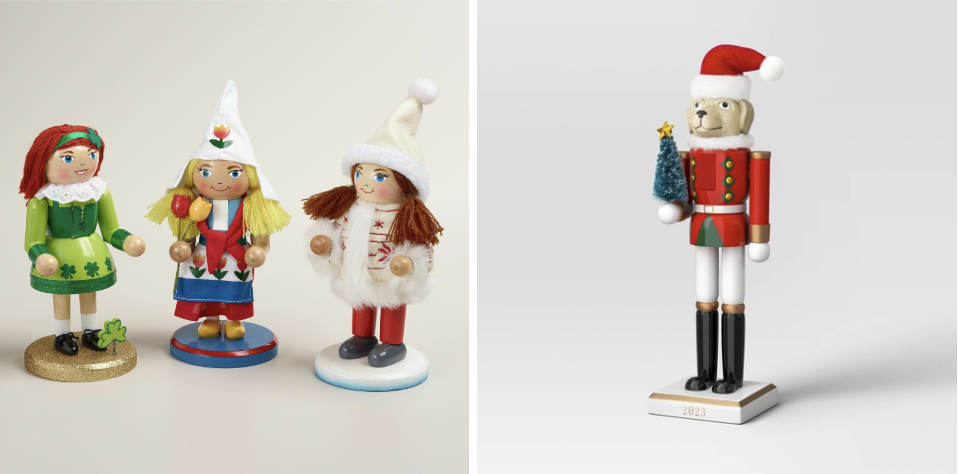
1. Now that you know a little about the history behind nutcrackers, choose if you want to create a traditional or a more modern nutcracker. Below are some examples of both:
Traditional

Modern
2. Once you figured out which nutcracker you would like to create, grab a sketchbook, pencil, and eraser & follow the picture below. If you don’t have a sketchbook, you use white blank pieces of paper.
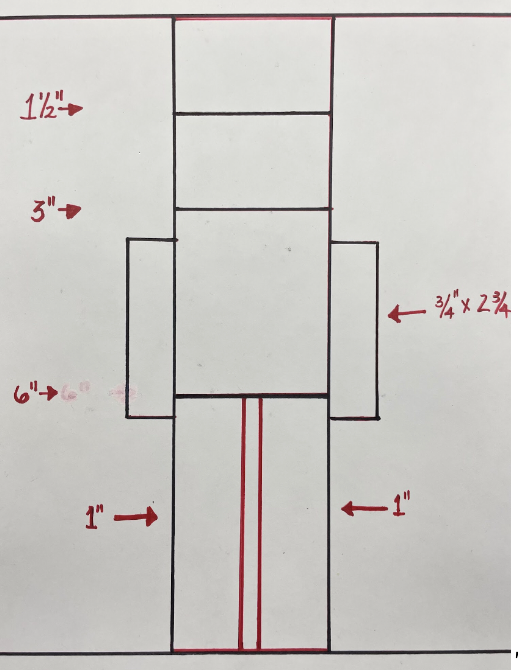
Nutcracker Blueprint
Step 1: Start by drawing a ½ inch margin at the top of your page and a ½ inch margin at the bottom of the page.

Step 2: Draw a 10-inch vertically X 2 ½ inches horizontally rectangle down the center of the page. Starting at the top margin and ending at the bottom margin.
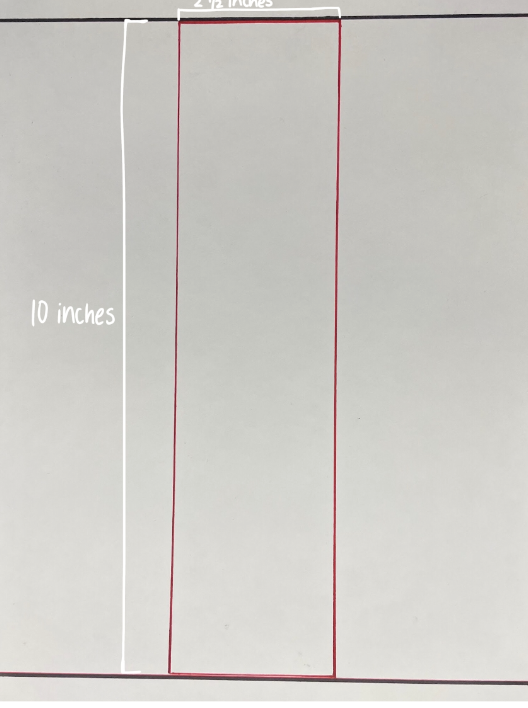
Step 3: Measure 6-inches down from the top margin and draw a horizontal line from the right side of the rectangle to the left side.
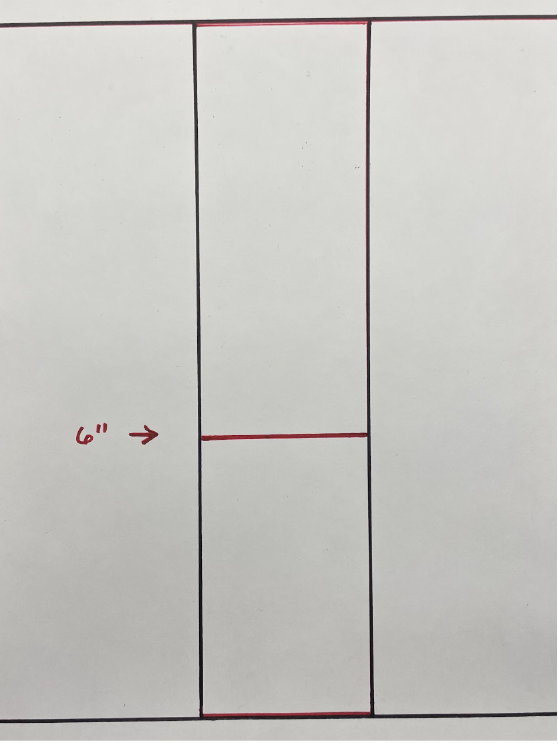
Step 4: Measure 3-inches down from the top margin and draw a horizontal line across from the right side to the left side of the rectangle.
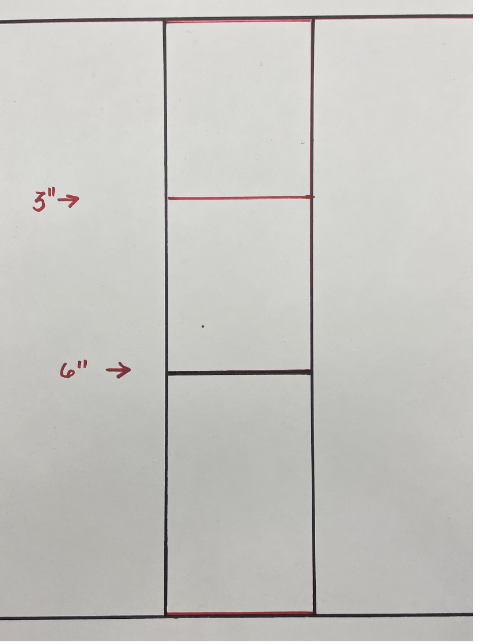
Step 5: Measure 1 ½ inches down from the top margin and draw a horizontal line across from the right side to the left side of the rectangle.
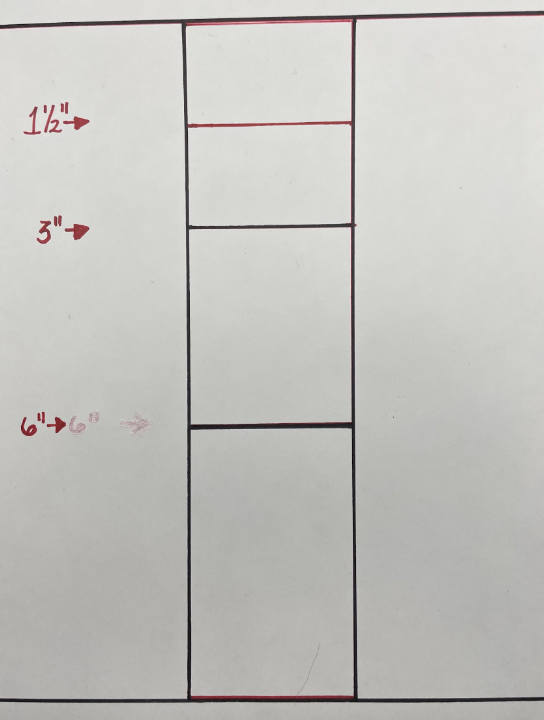
Step 6: Add two rectangles that are ¾ inches x ¾ inches on the right and left side of the larger rectangle. These will serve as the arms.
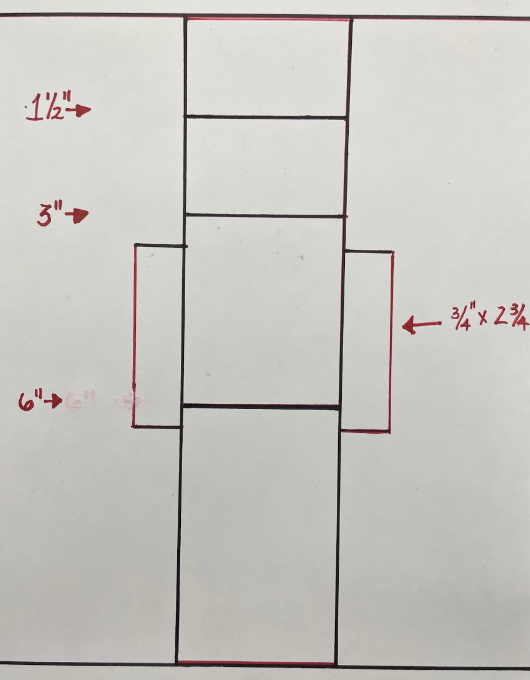
Step 7: In the lower half of the rectangle, divide the space into 2 rectangles that are 1 inch x 4 inches. These will serve as the legs.
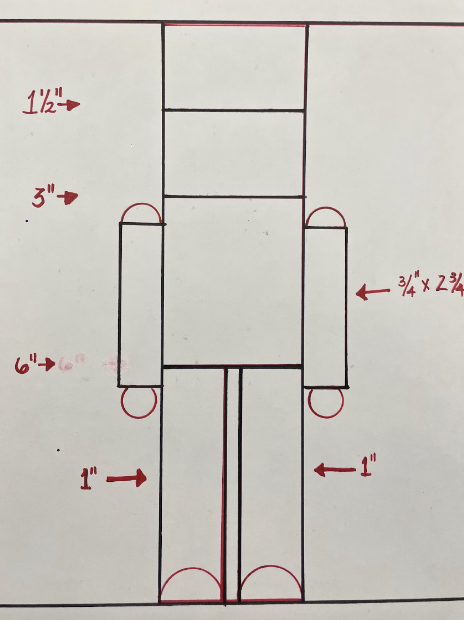
Step 8: Add semicircles for the shoulders and feet and circles for the hands.
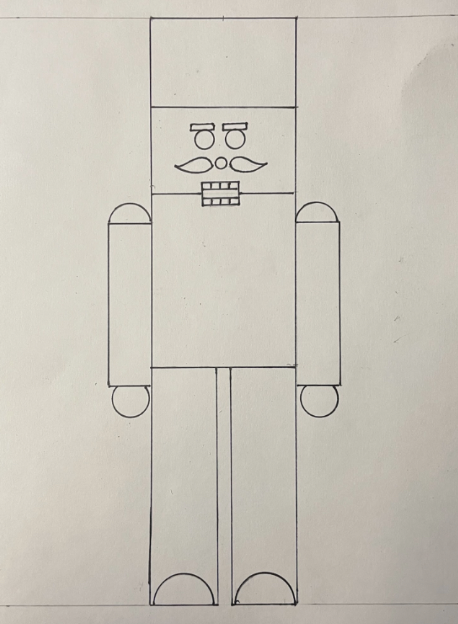
Step 9: Outline, color, and decorate your Nutcracker however you like.
3. Next, get a cardboard toilet paper and paper towel roll and follow the pictures below.
Creating The Cardboard Nutcracker
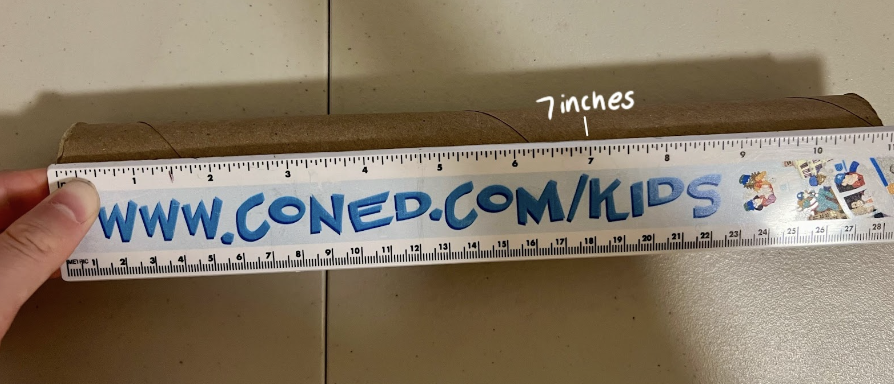
Step 1: Take the paper towel roll (the longer one), and measure 7 inches. Flatten the cardboard so it’s easy to cut off.
Step 2: Saving the excess cardboard that was cut off from the paper towel roll and the toilet paper roll, flatten both rolls.
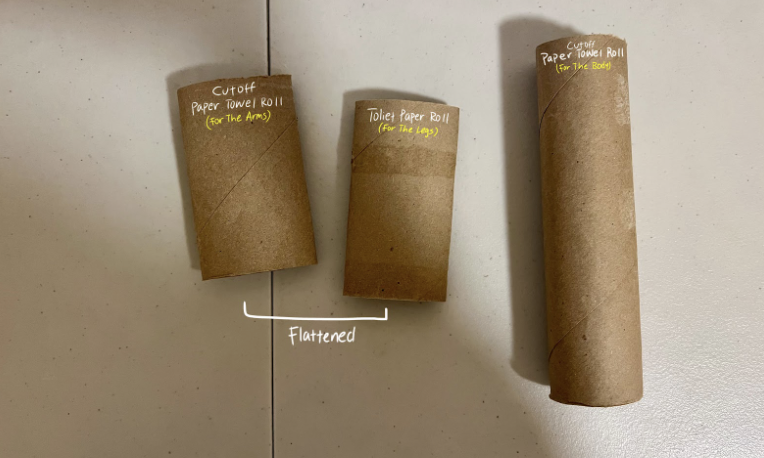
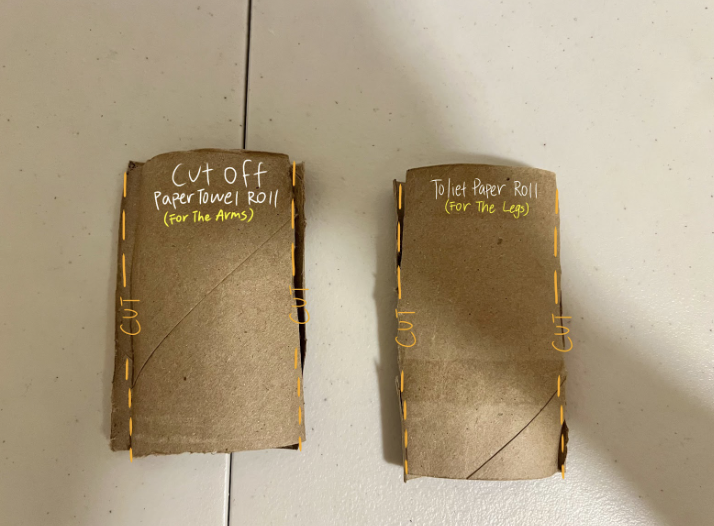
Step 3: Cut both paper towels in half lengthwise.
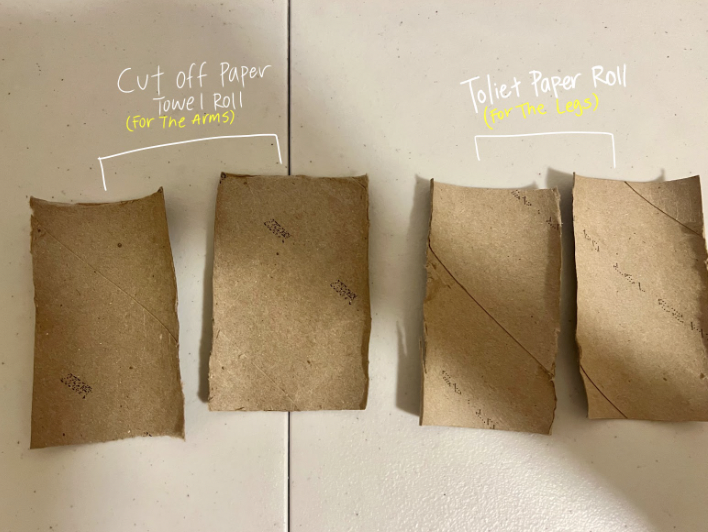
Step 4: Roll the four pieces of cardboard. If you’re having trouble making the cardboard stay in shape, use a marker to help you roll them. (It would be ideal to make the legs a little longer than the arms).
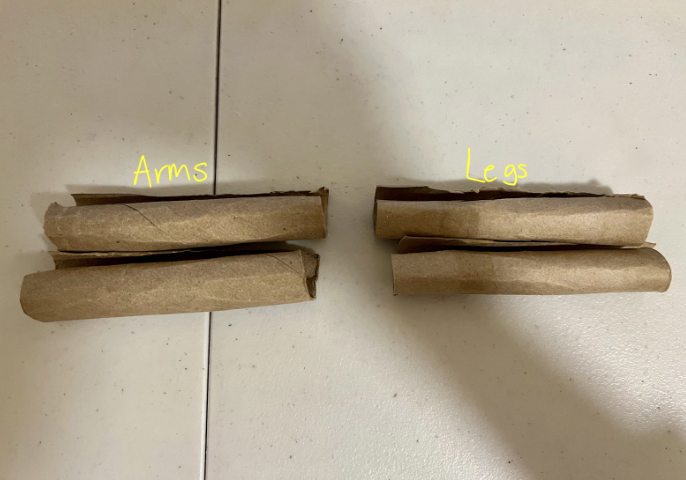
Step 5: Use a hot glue gun or any strong glue to glue the arms and legs together. You can use a marker to help you create and hold a tube-like shape. The arms should be a little bit longer and wider than the legs. If you’re using hot glue, try to remove all excess strings created by the glue.
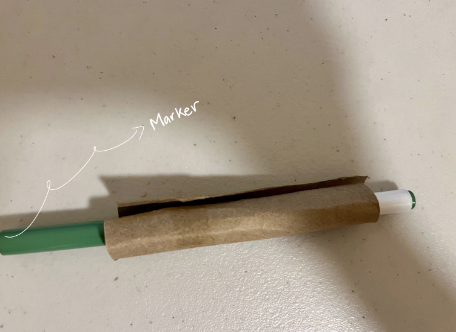
Step 6: After that, use white acrylic paint to prime every cardboard tube. By priming the tubes, the colors that we’ll apply later will pop out more.
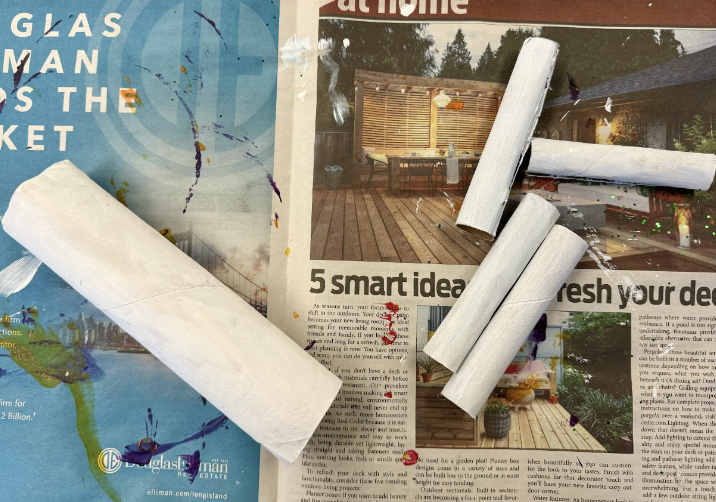
Step 7: Lightly sketch your design onto the four tubes by Thank using a pencil and eraser again.
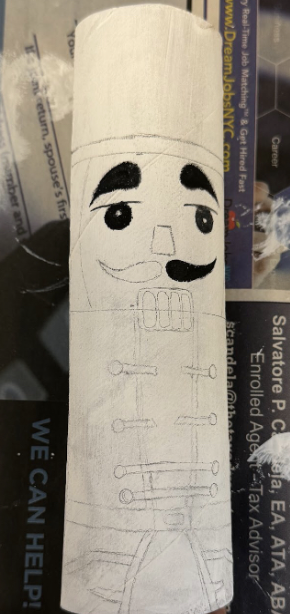
Step 8: Now it’s the fun part; painting and decorating our nutcrackers with all sorts of embellishments. You can use any color paint (try to stick to four to six colors though) and embellishments to decorate your nutcracker. Also, it’s okay if you completely create a different nutcracker than what you sketched because that was only a blueprint!
Step 9: Lastly, it’s time to assemble our nutcracker. Using the hot glue or any strong glue again, glue the arms and legs onto the body. The arms should be glued a little bit under where the clothes start and the legs should be glued inside the tube for the body.
Final Product
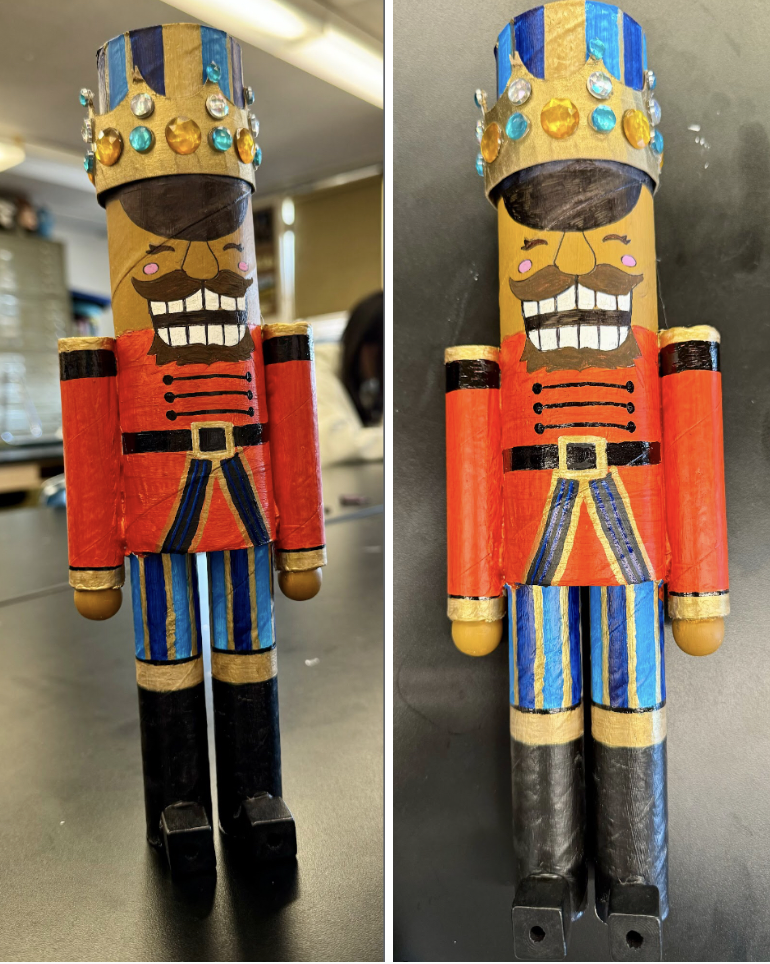
All photos belong to Ms. Salisbury

